How To Create A Printable Form In Google Docs: A Comprehensive Guide
In today’s digital age, the ability to create and print forms quickly and easily is essential for businesses and individuals alike. Google Docs, a versatile and widely used word processing tool, offers a convenient and efficient solution for creating printable forms.
This comprehensive guide will walk you through the step-by-step process of creating a printable form in Google Docs, from setting up the basic structure to adding advanced features. Whether you’re a beginner or an experienced user, this guide will provide you with the knowledge and skills you need to create professional-looking and functional forms.
Getting Started
Yo, check it, creating printable forms in Google Docs is a doddle. It’s like having a magic wand that turns your words into slick, professional-looking forms that you can print out and fill in whenever you need ’em.
Google Docs is the bomb for this because it’s free, easy to use, and you can access it from anywhere with an internet connection. Plus, you can collaborate with your mates on the same form, so you can all chip in and get the job done quicker.
Benefits of Using Google Docs
- It’s free, so you don’t have to fork out any dough.
- It’s a doddle to use, even if you’re a bit of a technophobe.
- You can access it from anywhere with an internet connection, so you can work on your forms on the go.
- You can collaborate with your mates on the same form, so you can all chip in and get the job done quicker.
Creating a New Form

Banging, bruv! Ready to craft a spiffing form in Google Docs? Follow these wicked steps and you’ll be the master of forms in no time.
First off, log in to your Google account and click on the “New” button. Then, hover over “More” and select “Google Forms.” This will open up a blank form where you can start adding your questions.
Adding Questions
Now, it’s time to get creative and ask those all-important questions. Click on the “+” button to add a new question. You can choose from a variety of question types, including multiple choice, short answer, and checkbox.
For each question, you can customize the question text, add a description, and even make it required. Once you’re happy with your question, click on the “Done” button.
Customizing Your Form
Not only can you ask questions, but you can also pimp out your form with a custom title, description, and theme. Click on the “Settings” tab to make these changes.
In the “General” section, you can change the form’s title and description. In the “Presentation” section, you can choose a theme that matches your branding or the purpose of your form.
Sharing Your Form
Once you’re satisfied with your form, it’s time to share it with the world. Click on the “Send” button and choose how you want to share it. You can send it via email, share a link, or embed it on your website.
That’s it, mate! You’ve now created a banging form in Google Docs. Go forth and gather those responses!
Designing the Form

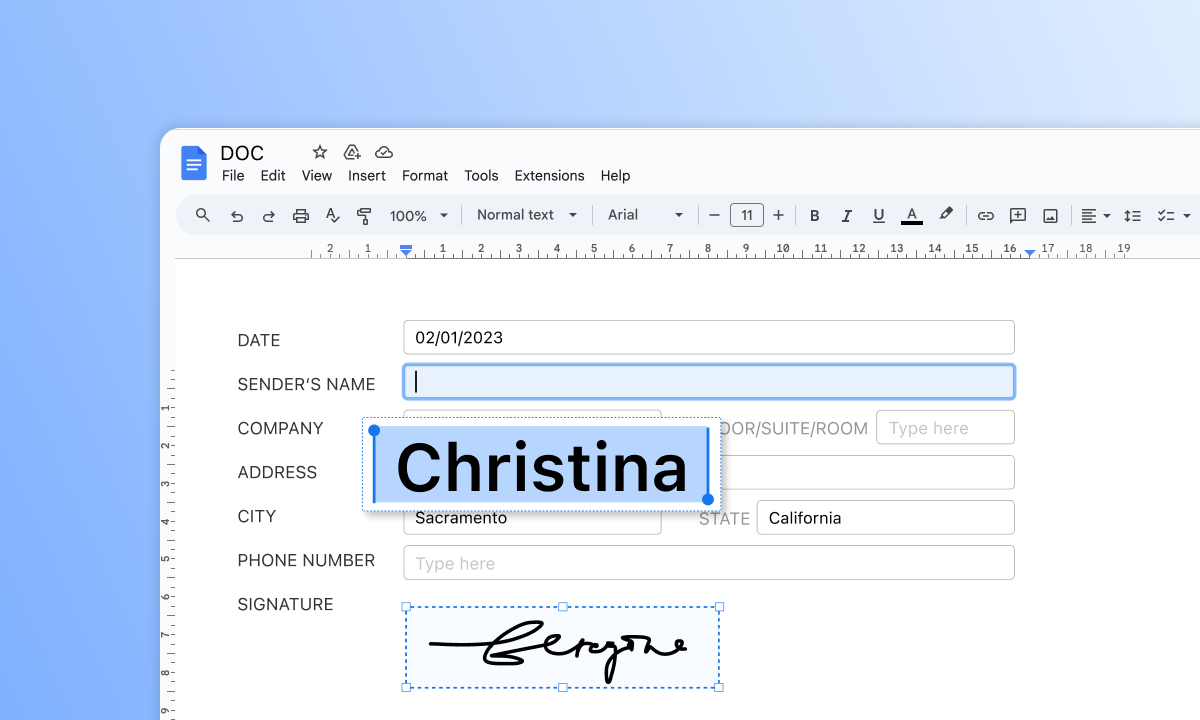
Designing a well-structured and visually appealing form is crucial for enhancing user experience and ensuring clarity. Google Docs provides various elements to customize your form, including fields, sections, and headings.
Fields
Fields are the core components of a form, allowing users to input data. There are different types of fields available, each serving a specific purpose:
- Text Fields: Allow users to enter free-form text responses.
- Checkbox Fields: Enable users to select multiple options.
- Radio Button Fields: Present users with a set of mutually exclusive options.
- Dropdown Fields: Provide a list of predefined options for users to choose from.
- Date and Time Fields: Allow users to select a specific date or time.
Sections and Headings
Sections and headings help organize and structure your form, making it easy for users to navigate and find the relevant information.
- Sections: Divide the form into logical groups, separating different sets of fields.
- Headings: Provide clear labels and titles for sections and individual fields.
Tips for Organization and Formatting
- Use descriptive field labels that clearly indicate the information required.
- Group related fields into sections to enhance clarity and organization.
- Employ headings and subheadings to guide users through the form.
- Use white space and line breaks to improve readability and prevent clutter.
- Consider using different colors or fonts to highlight important fields or sections.
Sharing and Collaborating on Forms

Collaborating on Google Forms is a breeze. You can share forms with others and give them permission to view, edit, or collaborate. This makes it easy to work on forms together, gather feedback, and collect data from multiple sources.
To share a form, click the “Share” button in the top right corner of the form editor. You can then enter the email addresses of the people you want to share the form with. You can also choose the level of access you want to give them.
Sharing Permissions
There are three levels of sharing permissions:
- Can view: The user can only view the form and its responses.
- Can edit: The user can view, edit, and make changes to the form.
- Can collaborate: The user can view, edit, and collaborate on the form with other users.
You can also choose to make the form public. This means that anyone with the link to the form can view and submit it.
Managing Sharing Permissions
To manage sharing permissions, click the “Share” button in the top right corner of the form editor. You will see a list of the people who have access to the form. You can then change their permissions or remove them from the list.
Advanced Form Features

Advanced form features in Google Docs empower you to create sophisticated forms that meet your specific needs.
These features include:
Using Scripts
Scripts are bits of code that you can add to your form to extend its functionality. For instance, you can use scripts to:
– Validate form data before submission
– Send email notifications based on form responses
– Integrate your form with other applications
Importing Data
You can import data into your form from a spreadsheet or a database. This is useful if you have a lot of data that you want to pre-populate in your form.
Creating Templates
You can create templates for your forms so that you can easily reuse them later. This can save you time and effort when creating similar forms.
Troubleshooting Common Issues
Creating forms in Google Docs is generally straightforward, but users may occasionally encounter issues. This section addresses common problems and provides solutions and troubleshooting tips.
If you are having trouble with your form, try the following troubleshooting tips:
Unable to access or edit a form
- Ensure that you have the correct permissions to access and edit the form. The form owner must grant you editing permissions.
- Check if the form is shared with you. If not, request access from the form owner.
- Make sure you are signed in to your Google account and have a stable internet connection.
Form not displaying correctly
- Refresh the page or try accessing the form from a different browser or device.
- Clear your browser’s cache and cookies.
- Ensure that you have the latest version of your browser installed.
Form submissions not being received
- Check if the form is set to collect responses in a Google Sheet. If not, set up a destination for responses.
- Make sure the form is published and shared with the intended recipients.
- Check if there are any restrictions or filters applied to the form that may be preventing submissions.
Other issues
- If you encounter any other issues, try contacting Google Support for assistance.
FAQs
Can I add images or logos to my form?
Yes, you can add images or logos to your form by clicking on the “Insert” menu and selecting “Image.” You can then upload an image from your computer or insert an image from the web.
Can I use conditional logic to control the visibility of fields?
Yes, you can use conditional logic to control the visibility of fields based on user responses. To do this, click on the “Format” menu and select “Conditional Logic.” You can then create rules to specify which fields should be visible or hidden based on the values of other fields.
Can I share my form with others and collaborate on it?
Yes, you can share your form with others and collaborate on it. To do this, click on the “Share” button and enter the email addresses of the people you want to share the form with. You can also specify the level of access that each person has.