1 Inch Number Stencils Printable: Enhance Your Projects with Precision and Creativity
Embark on a journey of precision and creativity with 1 inch number stencils printable, a versatile tool that empowers you to add a touch of numerical elegance to your projects. Whether you’re a seasoned crafter or a novice enthusiast, these stencils offer endless possibilities for customization and artistic expression.
In this comprehensive guide, we’ll delve into the world of 1 inch number stencils printable, exploring their applications, design techniques, and troubleshooting tips. Get ready to unlock your inner artist and transform your creative endeavors with the power of numbers.
Introduction to 1 Inch Number Stencils Printable
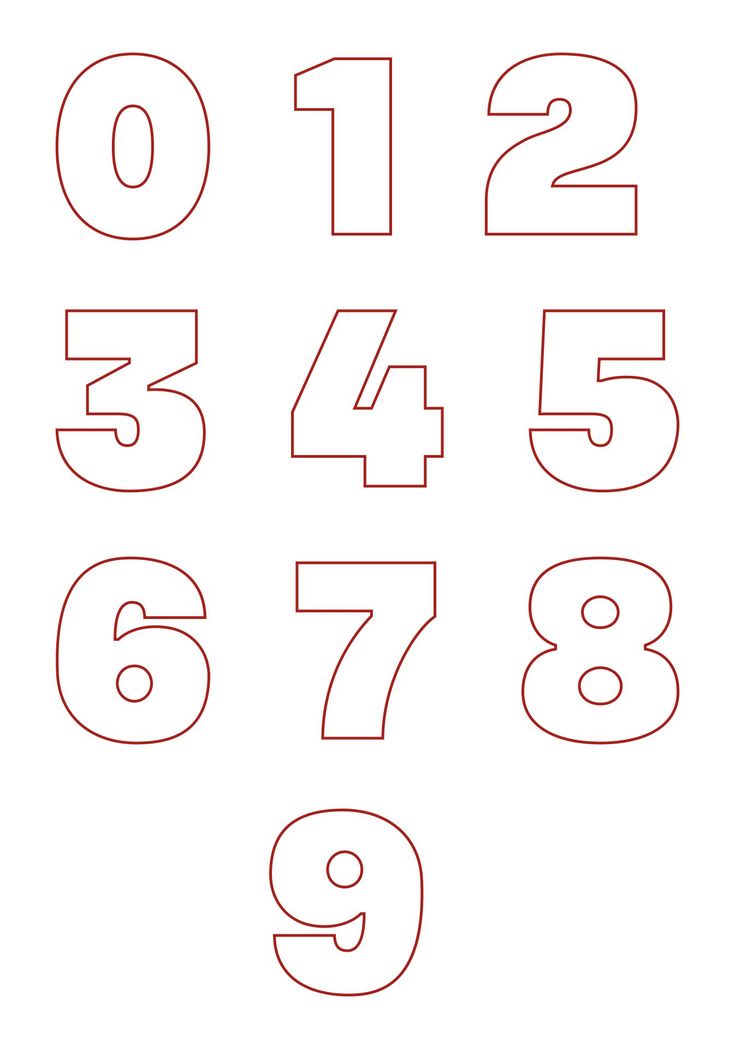
1 inch number stencils are pre-cut templates that feature the numbers 0 through 9 in a 1-inch height. They’re commonly used for marking, labeling, and creating designs on various surfaces.
Printable stencils offer numerous benefits, including convenience, cost-effectiveness, and versatility. You can print them on regular paper or cardstock, making them readily available whenever you need them. Additionally, they’re reusable, allowing you to save money compared to purchasing pre-made stencils.
Applications of 1 Inch Number Stencils Printable
These stencils find application in a wide range of projects, including:
- Marking and Labeling: Numbering boxes, shelves, tools, and other items for easy identification and organization.
- Crafting and DIY Projects: Creating custom signs, posters, and decorative elements for home décor, scrapbooking, and other crafts.
- Educational Purposes: Assisting children in learning numbers, counting, and math concepts through hands-on activities.
Materials and Equipment
To create your own printable number stencils, you’ll need a few basic materials and tools. Here’s a list of what you’ll need:
- Printer
- Cardstock or other thick paper
- Scissors
- Craft knife or exacto knife
- Cutting mat
- Ruler or measuring tape
- Pencil or pen
When choosing your materials, it’s important to keep in mind the quality of the finished product. Using high-quality materials will result in stencils that are durable and easy to use. For example, using thick cardstock will help to prevent the stencils from tearing or bending, and using a sharp craft knife will help to create clean, precise cuts.
Printer
The type of printer you use will depend on the size and quality of the stencils you want to create. If you’re only planning on making small stencils, a standard inkjet printer will suffice. However, if you want to make larger stencils or stencils with intricate designs, you may want to invest in a laser printer. Laser printers produce higher-quality prints with sharper lines and more detail.
Cardstock or other thick paper
The type of paper you use for your stencils will also affect the durability of the finished product. Cardstock is a good choice for stencils because it is thick and sturdy. However, you can also use other types of thick paper, such as construction paper or Bristol board.
Scissors
You will need scissors to cut out the stencils. Choose a pair of sharp scissors that are comfortable to use.
Craft knife or exacto knife
A craft knife or exacto knife is a sharp knife that is used for precision cutting. You will use this knife to cut out the intricate details of the stencils.
Cutting mat
A cutting mat is a protective surface that you can use to cut on. This will help to prevent damage to your work surface.
Ruler or measuring tape
You will need a ruler or measuring tape to measure and mark the stencils.
Pencil or pen
You will need a pencil or pen to draw the Artikels of the stencils.
Design and Creation of Stencils

Designing effective number stencils involves considering factors like clarity, readability, and intended use. Keep lines bold and simple, avoiding intricate details that could make cutting or painting difficult. Use contrasting colors for stencil and background to enhance visibility.
Methods for creating stencils range from using software to manual cutting. Software options offer precision and customization, allowing for complex designs and accurate measurements. Hand-cutting requires more skill and patience but provides greater flexibility and customization options.
Precision and accuracy are crucial for effective stencils. Ensure stencil dimensions match the intended application, and cut lines are sharp and clean. Any deviations can compromise the final result.
Printing and Preparation

Yo, blud! Here’s the lowdown on printin’ and preppin’ your 1-inch number stencils like a pro.
First off, you need a printer. If you’re rollin’ with a laser printer, you’re sorted. But if you’re rockin’ an inkjet printer, make sure you use a high-quality paper like cardstock or photo paper.
Cutting and Trimming
Once you’ve printed your stencils, it’s time to get snippin’. Use a sharp pair of scissors to carefully cut out the numbers. Be precise, fam, because you want your stencils to be crisp and clean.
Then, you’ll need to trim the excess paper around the numbers. This will make it easier to apply the stencils and get those fresh lines. Use a ruler or a craft knife for a clean cut.
Application and Usage

Once your 1-inch number stencils are ready, you’re all set to create some amazing designs! Here’s a quick guide to help you apply the stencils accurately and achieve stunning results.
Before you start, make sure you have all the necessary materials. You’ll need a stencil brush, paint or other mediums, a flat surface to work on, and some masking tape to hold the stencil in place.
Applying the Stencils
- Choose a flat surface: This will help you apply the stencil evenly and prevent any smudging.
- Secure the stencil: Use masking tape to hold the stencil firmly in place. This will prevent it from moving while you’re applying the paint.
- Apply paint or other mediums: Use a stencil brush to apply a thin, even coat of paint or other mediums to the stencil. Don’t overload the brush, as this can cause the paint to bleed under the stencil.
- Lift the stencil carefully: Once you’ve applied the paint, carefully lift the stencil away from the surface. Hold it straight up to prevent any smudging.
Using Multiple Stencils
If you want to create more complex designs, you can use multiple stencils. Here are a few tips:
- Plan your design: Before you start, plan out your design and decide which stencils you’ll need.
- Use registration marks: To help you align the stencils correctly, use registration marks. These are small marks that you can make on the surface before you apply the stencils.
- Apply the stencils one at a time: Start by applying the base layer stencil. Once that’s dry, you can apply the other stencils one at a time, building up your design.
Examples and Inspirations
Unleash your creativity with 1-inch number stencils! Dive into a realm of possibilities, from quirky home décor to personalized projects. Let these examples spark your imagination and inspire you to create unique masterpieces.
Our stencils offer endless opportunities for customization. Transform ordinary surfaces into eye-catching works of art with a splash of paint or a touch of glitter. Explore the diverse categories below and discover how others have used our stencils to elevate their projects.
Wall Art
- Create a bold statement wall by stenciling large numbers on a blank canvas. Add pops of color and patterns to complement your décor.
- Transform an empty hallway into a vibrant gallery by stenciling numbers onto framed prints or canvases. Mix and match sizes and fonts for a playful touch.
Home Décor
- Add a touch of whimsy to your kitchen by stenciling numbers onto tea towels, placemats, or cutting boards. It’s a fun way to personalize your dining experience.
- Create custom cushions or throw pillows by stenciling numbers onto fabric. Combine different patterns and colors for a unique and cozy look.
Personalized Gifts
- Design heartfelt birthday cards by stenciling the recipient’s age or a special message onto the front. Add personal touches with glitter or embellishments.
- Create unique coasters or keychains by stenciling numbers onto wooden or ceramic surfaces. These make thoughtful and practical gifts for friends and family.
Craft Projects
- Embellish scrapbooks or journals with numbers to mark special dates or milestones. Experiment with different colors and techniques to create a visual narrative.
- Design custom T-shirts or tote bags by stenciling numbers onto fabric. Add your own designs or artwork to create one-of-a-kind pieces.
Troubleshooting and Tips

When using 1 inch number stencils, it’s common to run into a few snags. But don’t stress, fam! We’ve got your back with some troubleshooting tips and tricks to make your stenciling sesh a breeze.
Before we dive in, let’s break down some of the most common problems you might encounter:
- Stencils not sticking properly
- Paint bleeding under the stencils
- Stencils tearing or ripping
Now, let’s get down to the nitty-gritty and solve these problems like a boss!
Stencils Not Sticking Properly
If your stencils are acting up and refusing to stay put, don’t despair. Here’s what you can do:
- Make sure the surface you’re stenciling on is clean and dry.
- Use a spray adhesive or stencil adhesive to help the stencils stick better.
- Apply light pressure to the stencils while painting to prevent them from moving.
Paint Bleeding Under the Stencils
Ugh, paint bleeding under the stencils is the worst! But fear not, here’s how to stop that pesky paint from sneaking through:
- Use a thick, high-quality paint that won’t bleed easily.
- Apply a thin layer of paint and let it dry before adding another layer.
- Use a stencil brush or sponge to dab the paint on gently.
Stencils Tearing or Ripping
If your stencils are tearing or ripping, it’s time to handle them with extra care:
- Use durable stencils made of thick plastic or metal.
- Be gentle when removing the stencils after painting.
- Store the stencils flat to prevent them from warping or tearing.
Answers to Common Questions
What materials do I need to create 1 inch number stencils printable?
To create your own printable number stencils, you’ll need a printer, stencil paper or cardstock, a cutting tool (such as an exacto knife or scissors), and a ruler or measuring tape.
How do I design effective number stencils?
For effective number stencils, ensure the numbers are clear, legible, and proportionate. Use a font that complements your project’s style and consider the spacing between the numbers for optimal visual impact.
What are some troubleshooting tips for using 1 inch number stencils printable?
If the paint bleeds under the stencil, try using a thicker paint or applying less pressure while painting. For uneven stencil edges, ensure the stencil is firmly pressed down and use a sharp cutting tool to create clean lines.